One is to remove the motor, yoke, and carriage as one assembly and work on the motor while it is attached to the yoke. The second is to remove the motor from the yoke and work on it as a single unit. I'll be doing both since this will be a total teardown and describing things in detail as I go.
Step 8 - Remove the two slotted screws and lock washers holding the end cap or "nose plate" on the front of the arm. These screws are 1/4-20 threaded by 1" long .
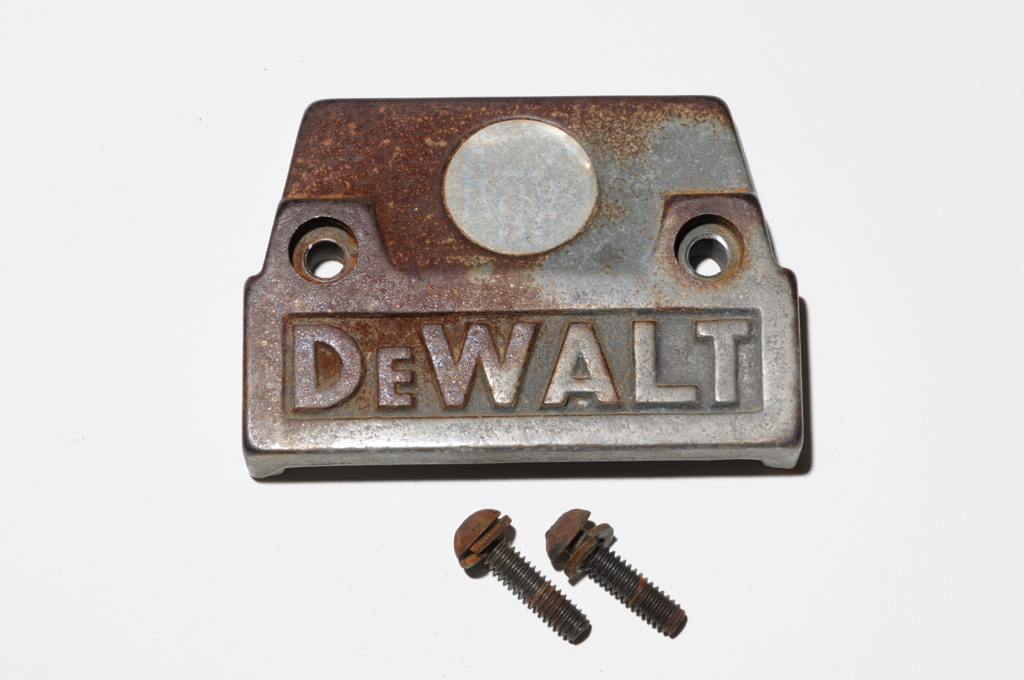
I'll be replacing them with black socket cap screws since I think they look cooler :-) about $0.50 each at McMaster.

Now we move everything to the front of the arm.
First you have to loosen the yoke clamp if it is not already.
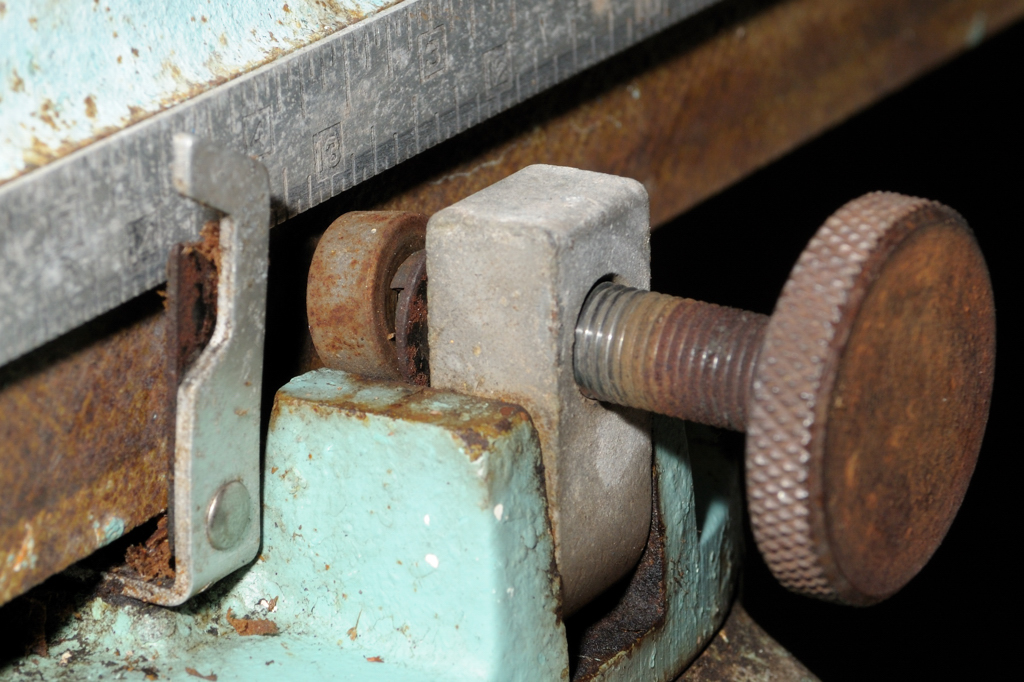
You'll need a 5/16" socket and a good, sharp flathead screwdriver.
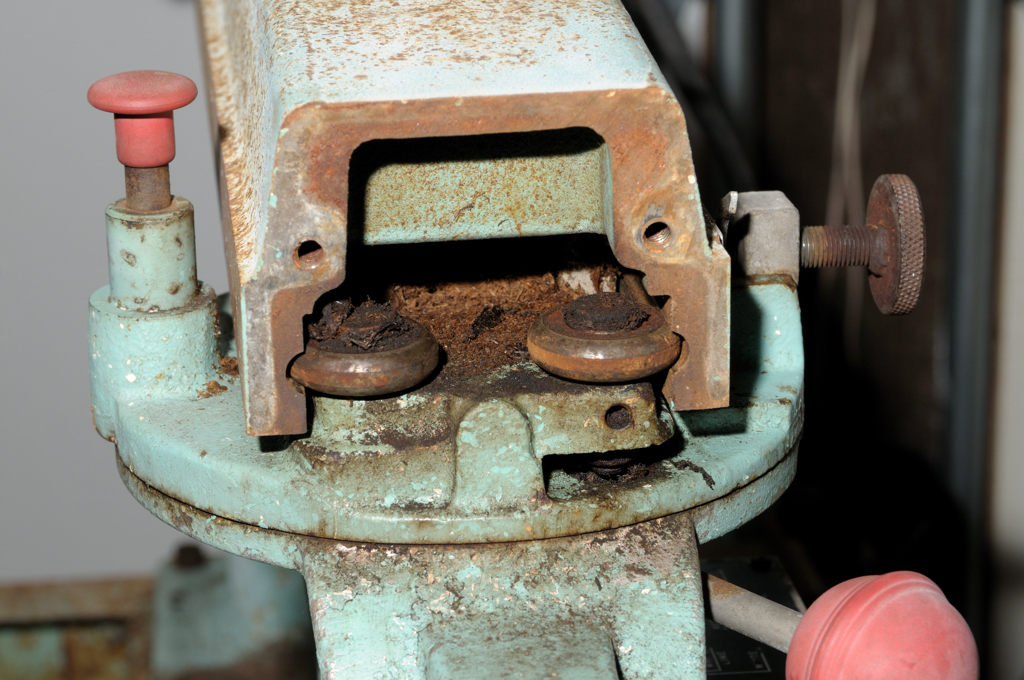
The castle nuts on the fan end
Step 9 - Loosen and remove the castle nuts.
Now you should be able to remove the end bell. You may need to tap it a bit with a decent dead weight hammer.
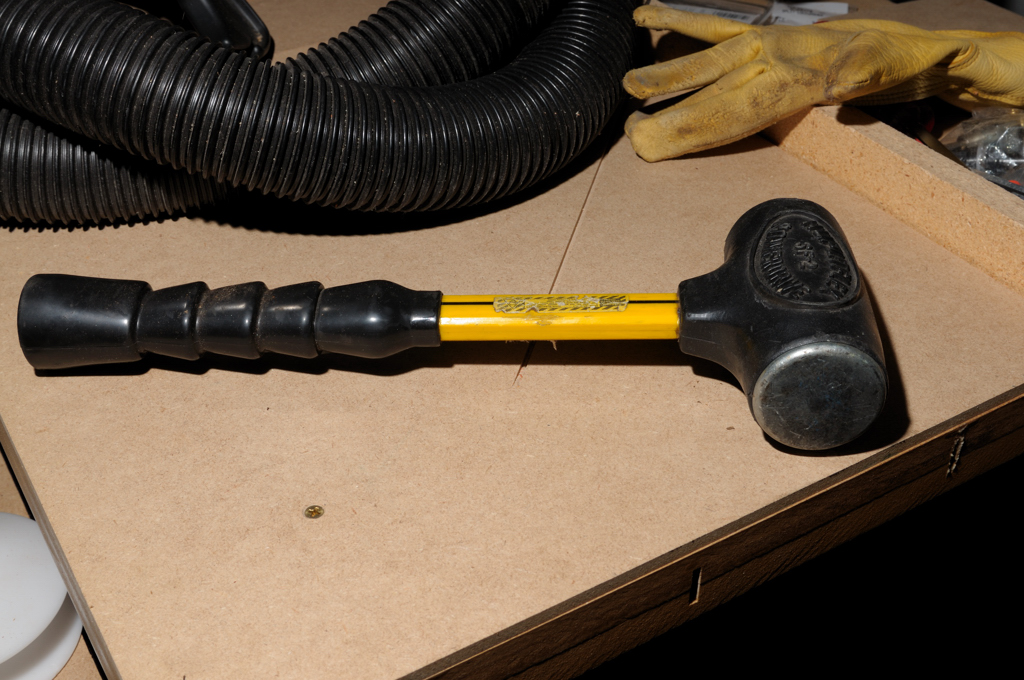
These are filled with sand and pack quite a punch.
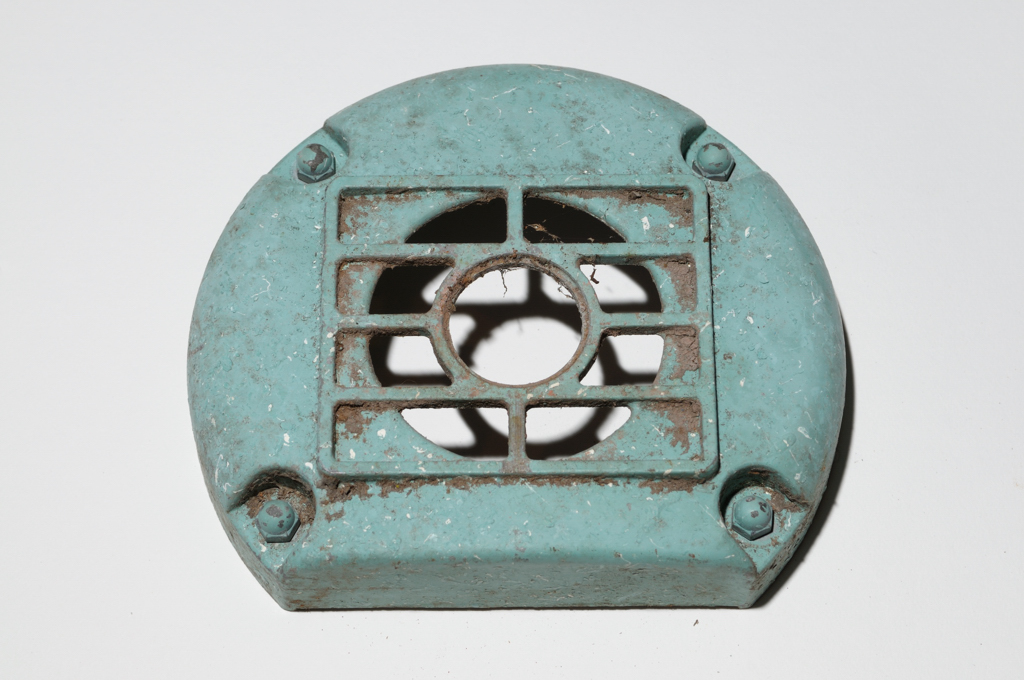
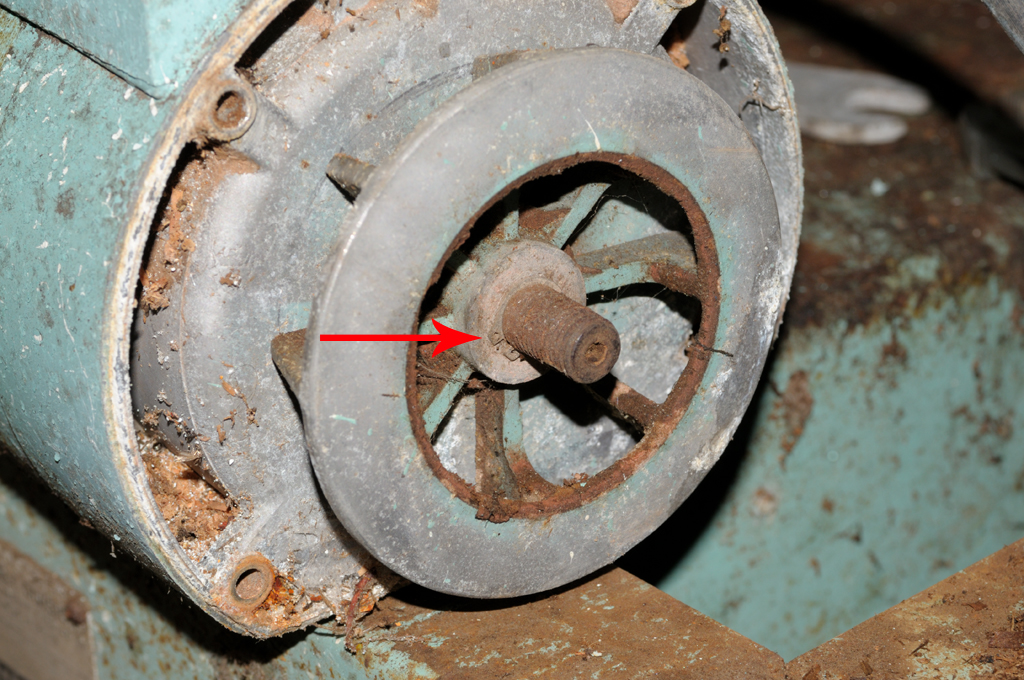
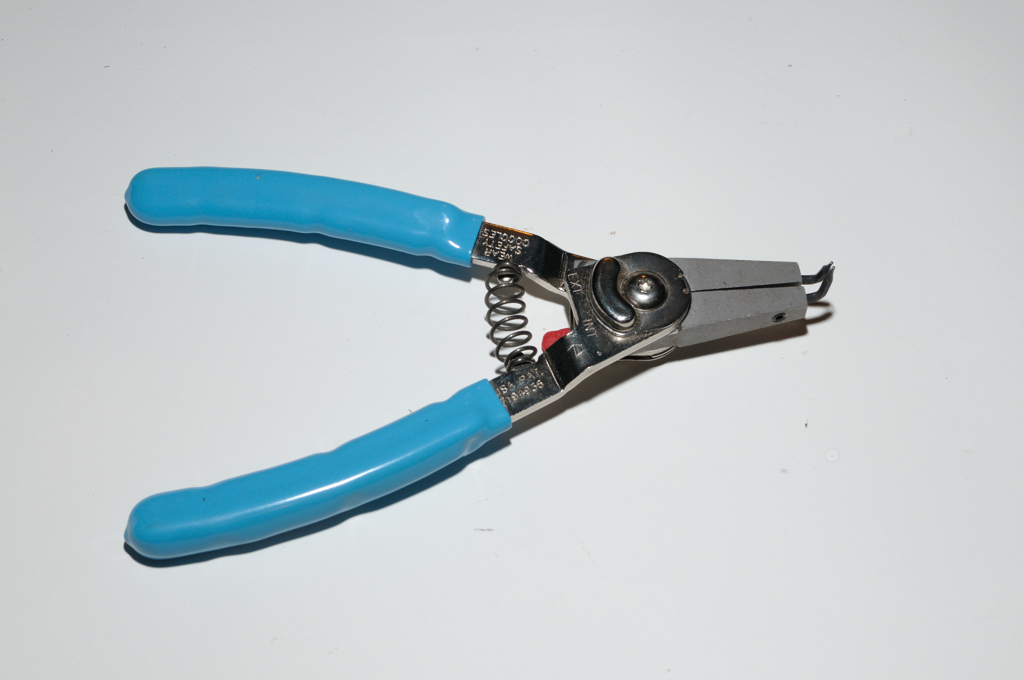
Step 10 - Now you can see the fan clearly. There is a small snap ring holding the fan on the motor shaft. You'll need a pair of snap ring pliers for this little job. They should be available at any auto parts of hardware store. In this image I had already removed the tie rods, on yours you should still see them coming through the housing and being held by small nuts (5/16").
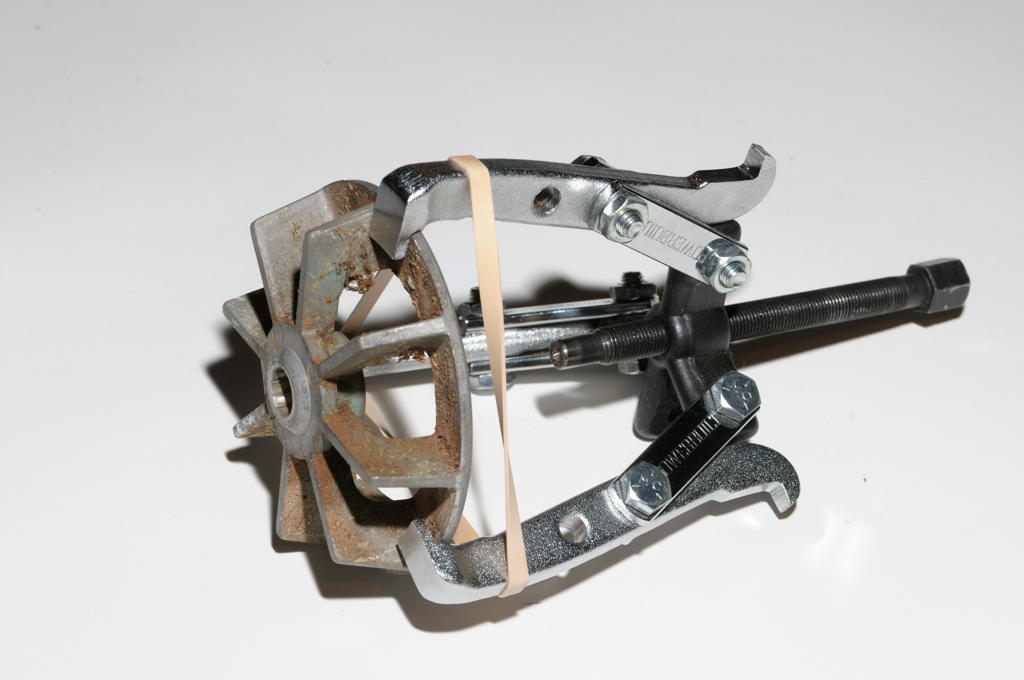
Step 11 - Once the snap ring is removed you'll need to get the fan off the shaft. I used a 3 arm puller. A two arm puller is easier to fit between the fan blades:

See how the three arm puller is impossible to align properly?:
It should come off easily. I mean this. If it does not come off easily then you are in danger of bending the fan. When in doubt use some penetrating oil like PB Blaster or Kroil and let it soak overnight.
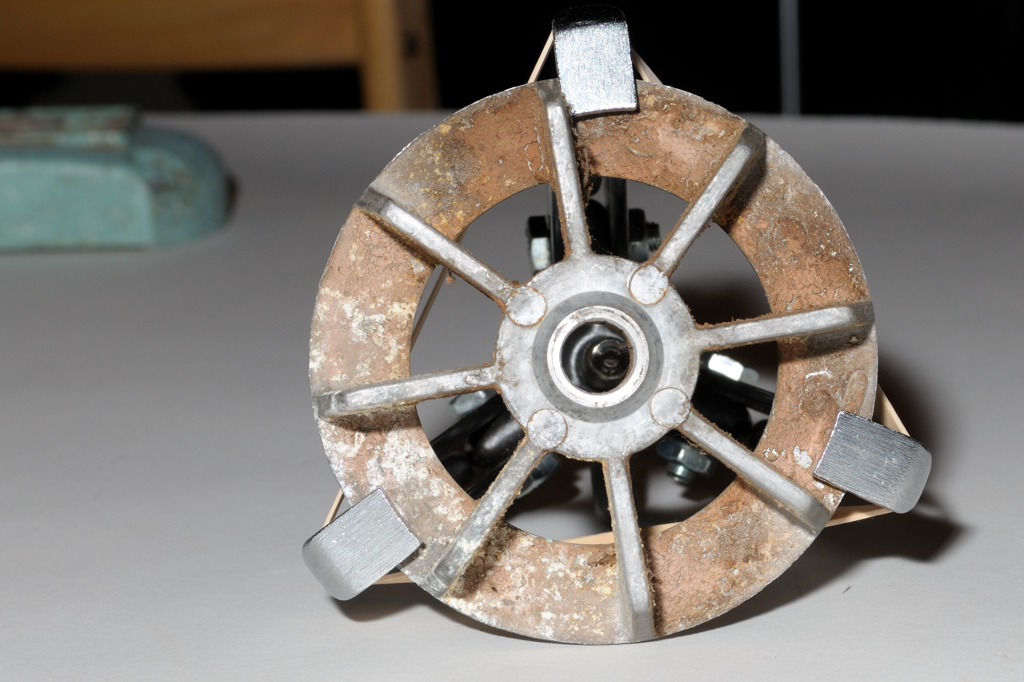
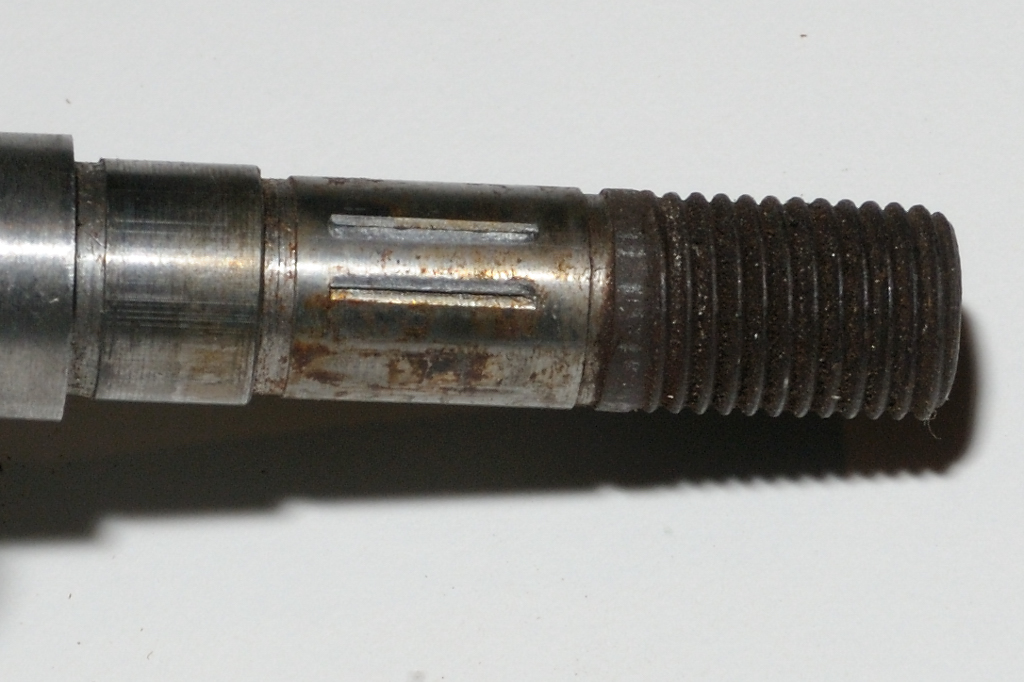
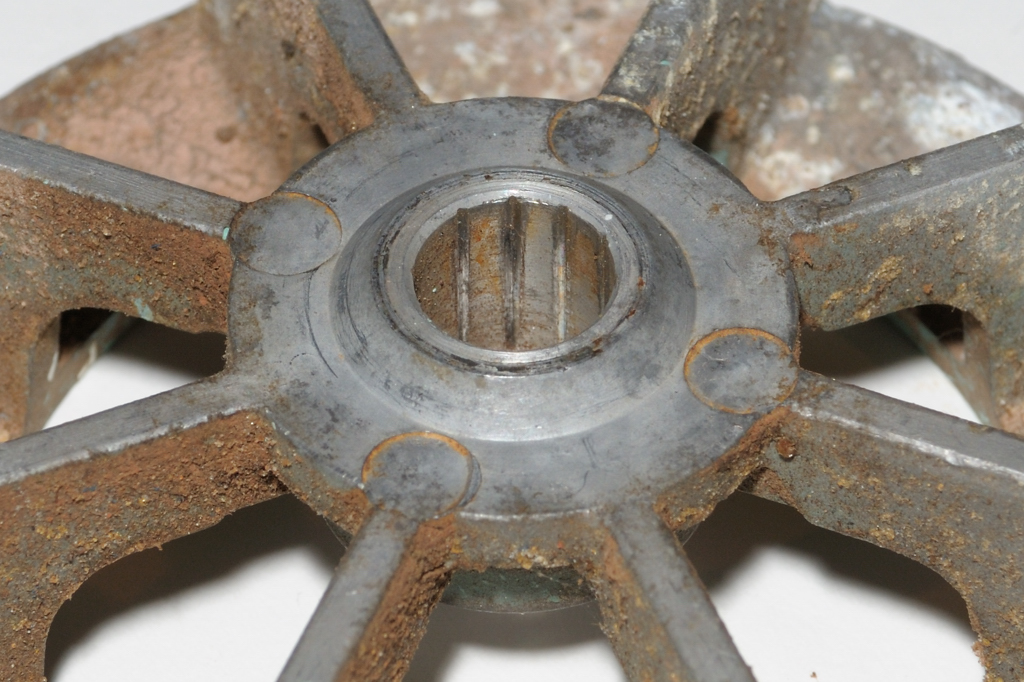
Notice that the shaft and fan are scored (keyed) to match each other? Make sure you take notice of this so you can put it back on exactly the way it came off.
Step 12 - Now take the nuts off of the tie rods and pull them out. They are also 5/16". Do it carefully and cleanly. Haste makes waste in this case. These tie rods are a pain to replace so be careful with them.
Step 13 - Once the tie rods are removed, gently tap the exposed shaft to displace the rear bearing from the housing.
Oops! You can learn from my mistakes. I seem to be missing the rear bearing! I took a large bolt, placed against the races of the bearing and was able to tap it out of the housing without any problem.
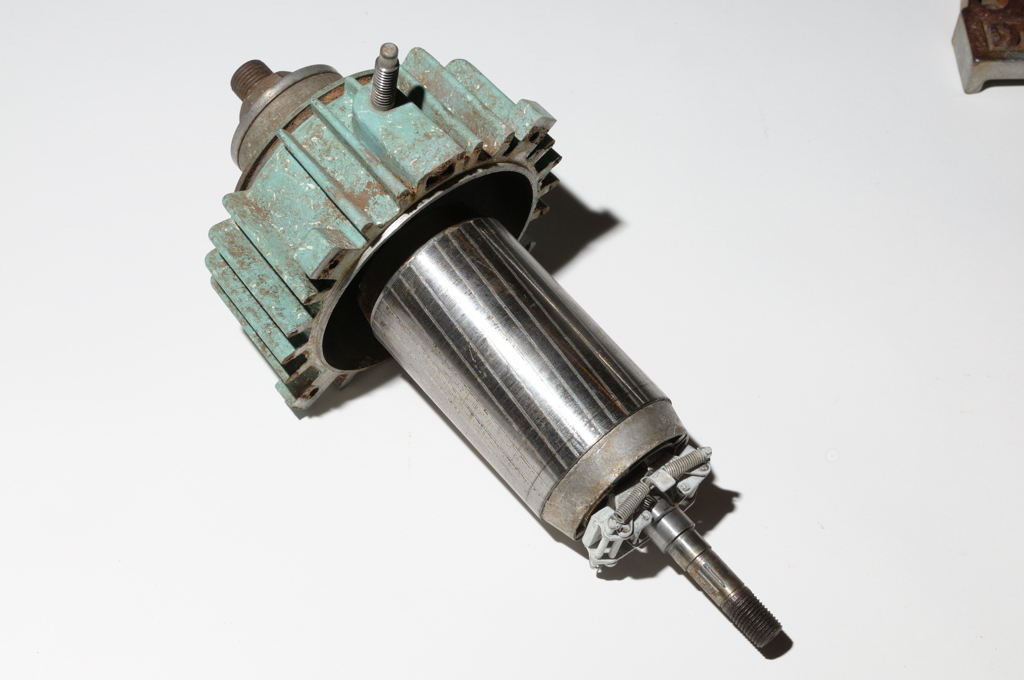
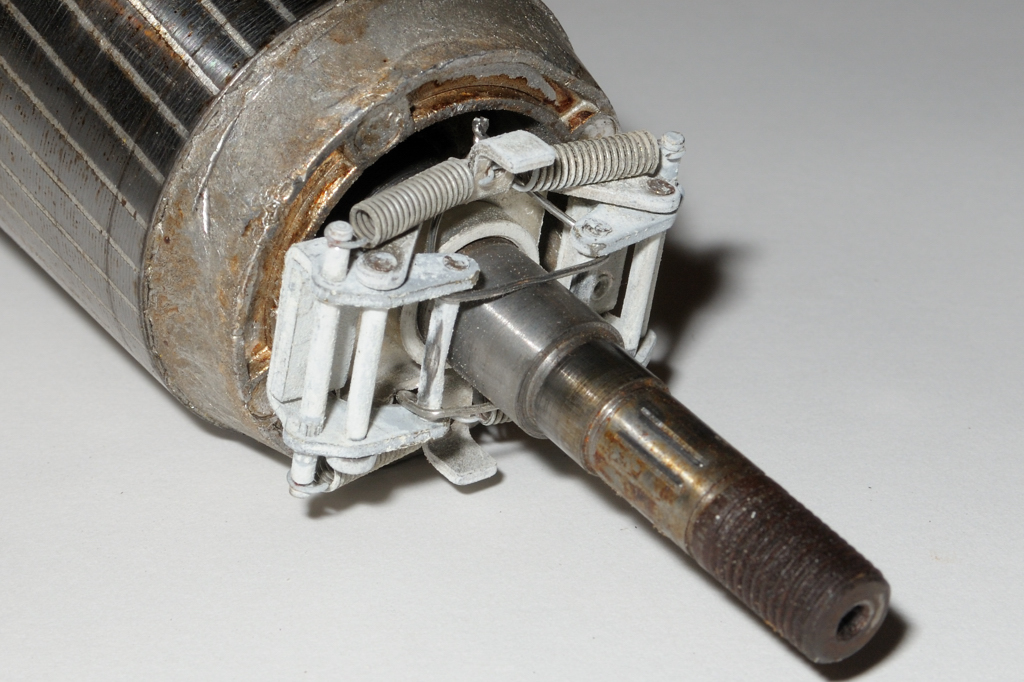
You can also see the centrifugal brake unit:
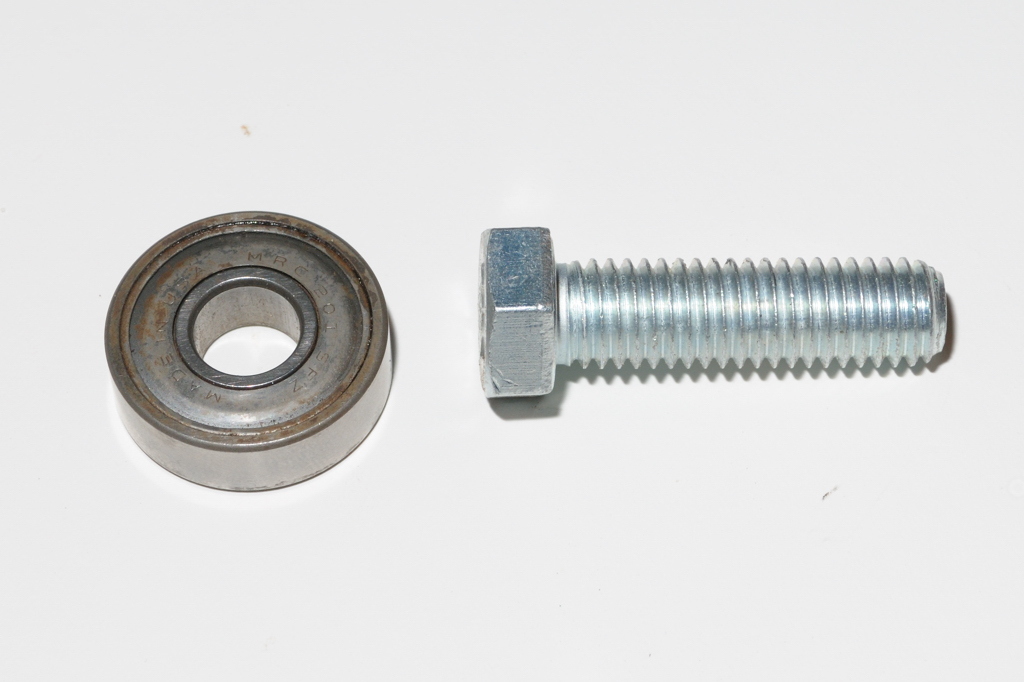
The rear bearing is an MRC 201 SFZ. If we head on over to:
Accurate Bearing, Inc., enter 201 and click the "Search by Part#" button I see that the 6201ZZ appears to match what I measure with my calipers.
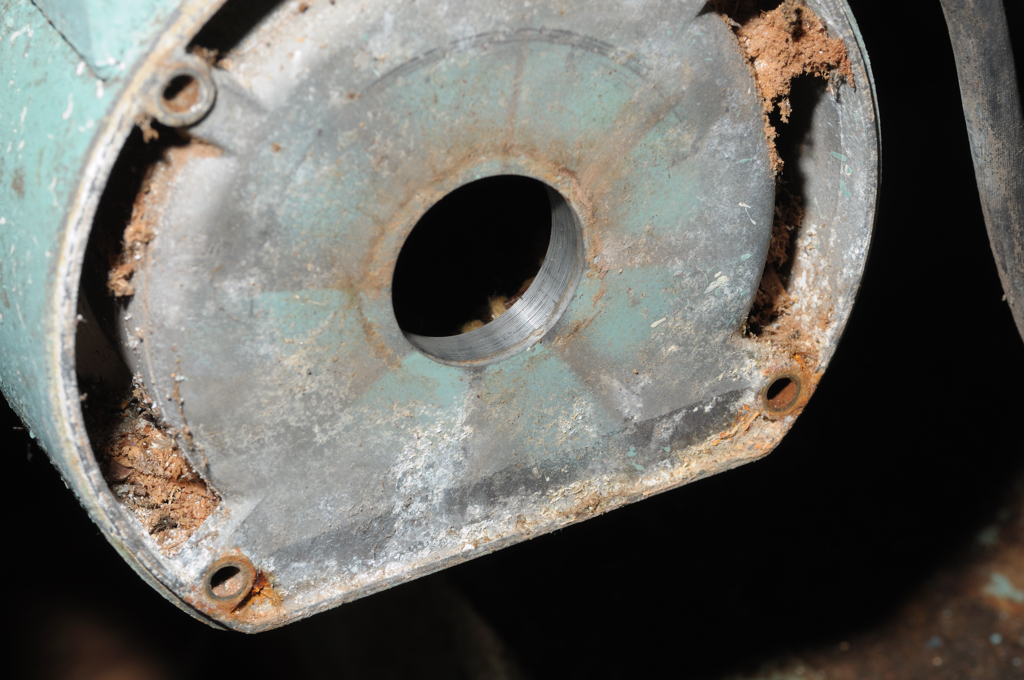
Well, I have hit a snag. There is an "Arbor Spacer" sitting on the arbor in front of the bearing. Apparently it is supposed to just slide off but mine does want to come off. At all.
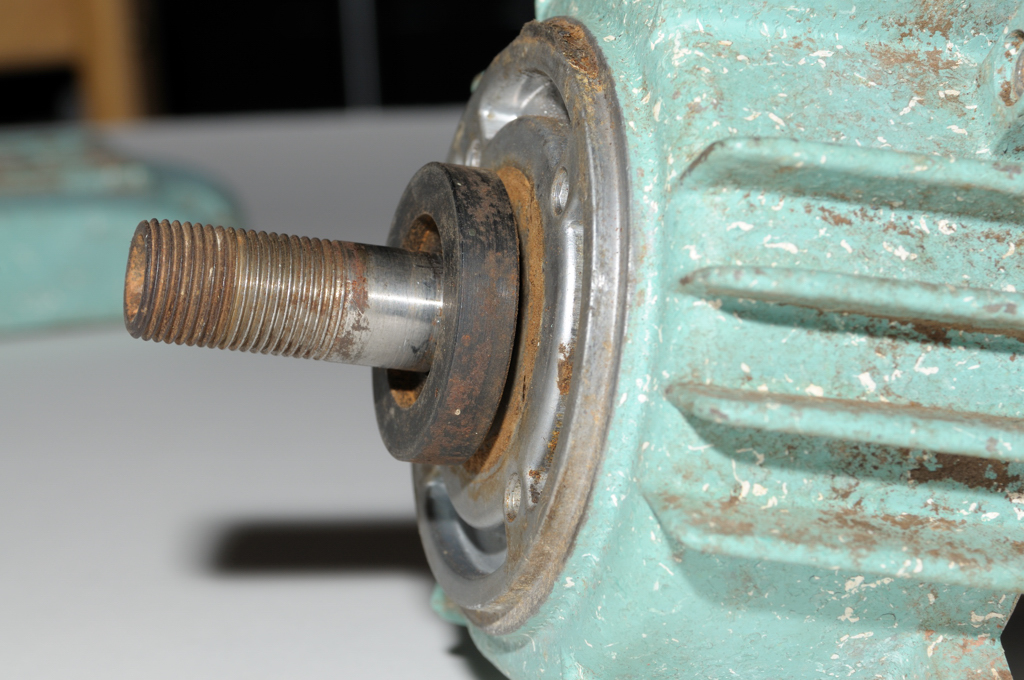
Time to head over to http://www.owwm.org and ask the oracle if anyone else has encountered this. In this image you can also see the relatively excellent condition of the arbor. I can't wait to get that bad boy on the wire wheel for a little cleanup!
Take a look at the windings and the stator - Beautiful! Especially for a 50 year old, wouldn't you say?
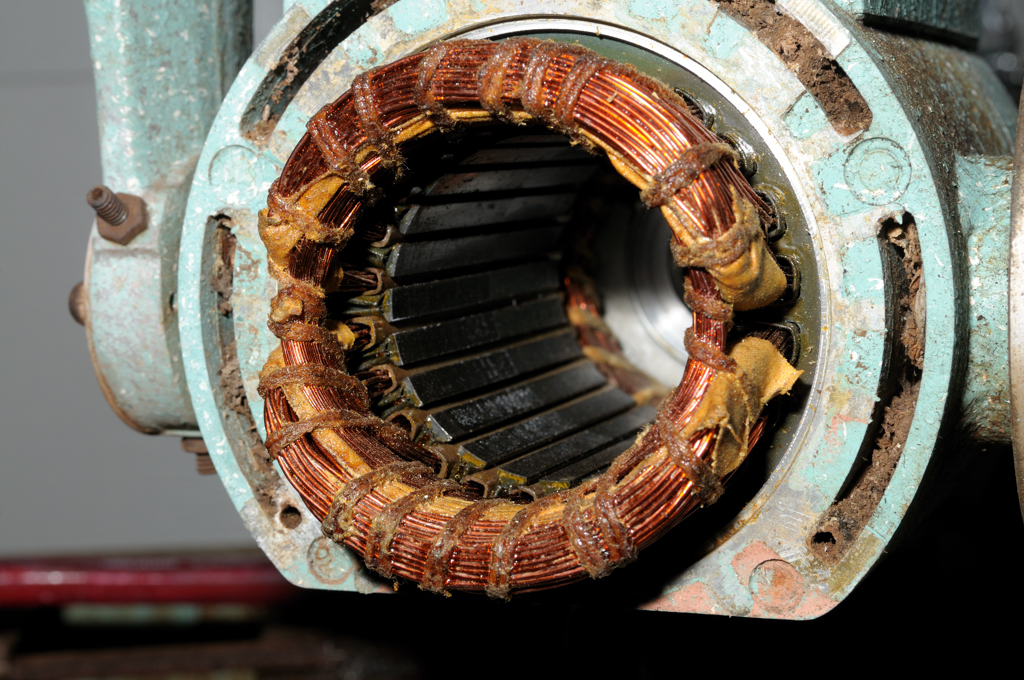
Not even Baldor makes them this nice any more.
Let's take the next step.
Man love the work you have done with the saw. Ive been wanting to work on my 945 for the longest time.I finally got the courage to do so and it seems the moise im getting from my motor is from the fan being pretty much broke 3 of the "spokes" connecting it to the main hub are broke do you know where to find a replacement?
ReplyDeleteI have an extra. email me at allthingskenteroo@gmail.com if you want one.
ReplyDelete