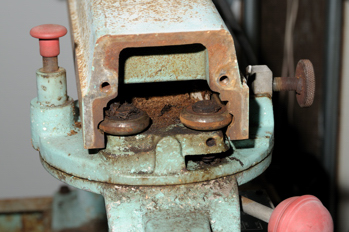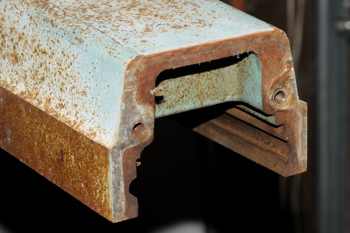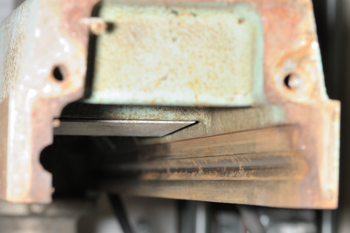


See those rounded grooves that run the length of the arm? Those are the ways. The roller bearings that are mounted to the roller carriage fit in and travel along those ways. It is critical that they be as smooth as possible and also that they be parallel along their entire length. This ensures smooth travel of the rollerhead along the arm.
In rare cases, the saw may have been used to do thousands of repetitive cuts near the fence with contaminated ways. This can cause uneven wear in the ways which is a bummer when you are trying to perform precision cross cuts (or any other cuts). One symptom is that the blade shifts and tilts to the left or the right as the blade crosses the fence. This is not usually the case with saws owned by part time woodworkers. It is far more typical with larger saws that have been used by uncaring employees (and management) in an industrial setting.
More typical of the smaller saws is that the ways are slightly and evenly worn near the fence. In this case you can usually simply tighten the roller bearings tension to compensate (more on that later). You would still be able to feel the wear but it would not effect the cuts noticeably.
How to clean them? I use steel wool first. Then I usually clean the ways with WD40. Then repeat. Once you get all of the loose rust off you can see what is what. When I am feeling fussy I will use a small wire wheel on the Dremel to polish them up.
Once they are reconditioned it is important to keep them clean. Really. As in "clean them after each use" clean. Really clean. Did I mention that they need to be clean?
Never, EVER, grease the ways! I mentioned contamination above. This is what I was referring to. Grease, mixed with fine sawdust turns into and abrasive material once the grease component dries out. This is one of the enemies of precision and longevity on your new old RAS.
Click here to read about Day 2.
Nice Kent. On the third picture you can see the underside of the aluminum plate that attaches to and protects the electrical switch. I wonder if these were added by Dewalt for the 925 line in 1959, as neither my GWI (1954) nor my GS (1942) has anything like that. My old 925 had one as well, and though I sold that saw, I did save the cover to use on my GW.
ReplyDeleteBen