Then I used the hair dryer to warm the front bell for 60 seconds and fitted the front bearing into the bell. I pushed it in about 3/4 of the way in by hand. Good enough. Now take one of the tie rods that hold the motor together and fish it through the front retainer ring and through the bell. Using your fingers to hold the rear retainer in place and then thread the tie rod into one of the retainer's threaded holes. It's a pain. Once you do this you have a way to position and hold the damned retainer so you can thread the real screws through the front retainer and into the rear without it constantly shifting around.
Once you have the other three threaded, remove the tie rod and thread the last screw on. Them , this is important, tighten them all evenly, 1/2 turn at a time to pull the bearing the rest of the way into the bell but do not fully tighten them.
I could have pressed them back together but I chose this method because I wanted to be able to "fine tune" the tension when messing with the motor.
Now gently push the rotor into the motor housing so as not to scratch the stator. Fit the rear bearing into the rear housing after warming it with a hair dryer for 60 seconds. Now fit it in. You'll probably need to tap the front arbor to get the rear bearing into place. Take care to do it straight.
Now thread the tie rods through the motor housing into their nuts and tighten everything up a bit. Not all the way, just so the rotor can spin without scraping anything.
Plug in the motor and flip the switch. It runs! Yay. The relay works great. The motor spins strongly but I hear lots of oscillations. If it's not spinning smoothly turn the motor off immediately, of course!
Now tighten the tie rods and see what happens. Shift the position of the front bell if needed to minimize vibrations. Also finish tightening the screws on the front retaining ring.
In a perfect world it would be absolutely silent except for a slight hum and vibration. Listen to the motor. Envision a reason for each noise that you are hearing.
In my case my spider sense was tingling. I turned the motor off and felt the arbor. A bit warm. Hmmm. I spun the arbor by hand and hear a slight "tiff" tiff" tiff" sound, one for each rotation of the arbor (and different sounding depending on whether you are spinning clockwise or counter clockwise). Hmmm. And the motor housing is now warm to the touch. Hmmm.
Remove the tie rods, tap the rear arbor and remove the rotor again. This time the bearing stayed in the housing again. Fair enough, I left it there.
I took a look and saw something slightly dismaying - there is a piece of winding insulation cloth sticking out just enough to brush against the rotor, probably the brake unit, as it spins. Take a look at this view down the barrel and look at the top part of the hole. See it?
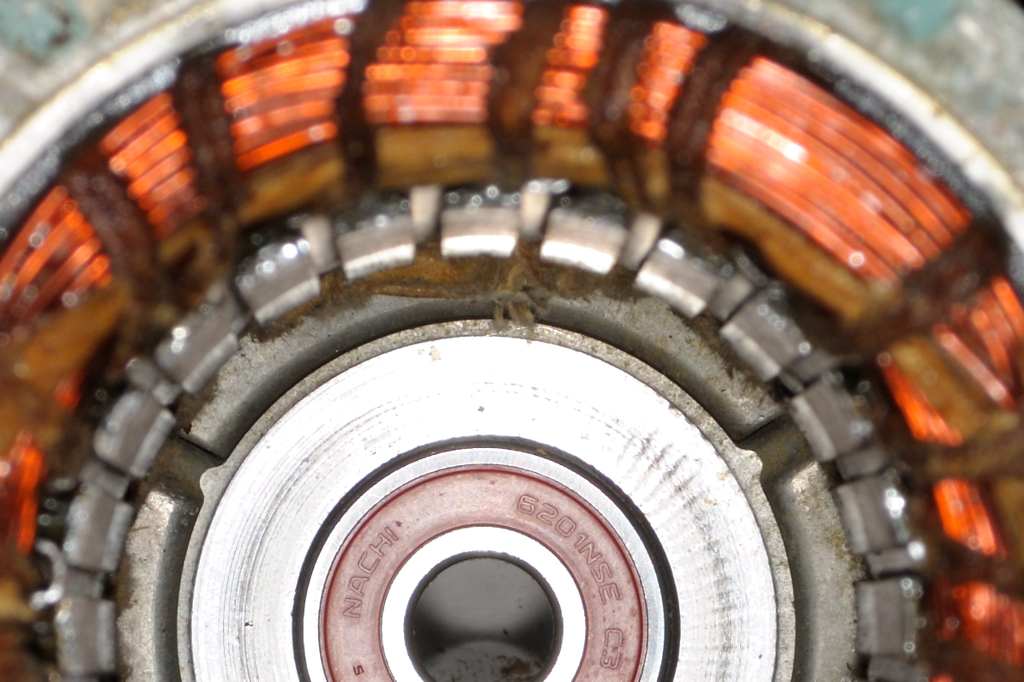
That is enough to really cause a major problem. I'll have to think about this a bit. This is Snag #2, actually. Read about Snag #1 here.
No comments:
Post a Comment